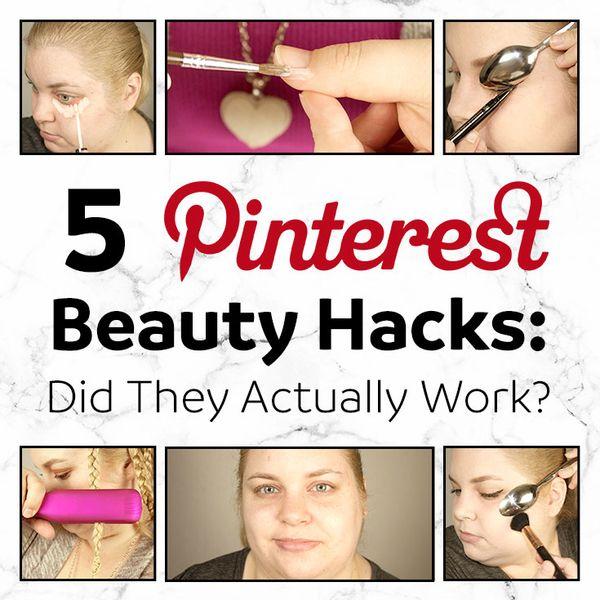
5 Pinterest Beauty Hacks: Did They Actually Work?
Pinterest is a great tool for finding new recipes, quotes, life hacks, cleaning tips, and more. It offers a wealth of information on nearly any topic, serving as a helpful resource, though it can sometimes lead to procrastination.
I particularly enjoy browsing tips and tricks that simplify daily tasks. While some tips are very creative, others seem overly complicated. I decided to test a few beauty tips to see if they are effective. Here’s what I discovered:
Get waves by using a straightener on braids
Tip: Braid your hair and press your straightener down the length of the braids to create waves.
My experience: Having thick, coarse hair, I was skeptical about this tip but still wanted to give it a try. Normally, I have to style my hair in layers, so I cautiously opted for two layers of braids, totaling eight. After braiding, I pressed my straightener down the length of each braid for a few seconds, similar to crimping. I repeated this process twice per braid to ensure even heat distribution. It took around five minutes. After letting them cool for a few minutes before unbraiding, I found that it did create waves, although differently than expected. If I were to try this again, I would use larger braids for looser waves, which might help the straight ends blend better.
Rating: 4 out of 5
Hide dark under-eye circles with lipstick
Tip: Use an eyeshadow brush to apply lipstick under your eyes before foundation or concealer. Choose shades based on skin tone: red with pink undertones for fair/light skin, red with purple undertones for medium skin, and coral with red undertones for dark skin. Start with a light layer of lipstick and cover it with concealer or foundation using a brush or sponge. Set with powder.
My experience: Initially, I was reluctant to apply lipstick on my face, fearing irritation. I tried two lipsticks: a matte orange/coral and a creamy peach. The matte lipstick was difficult to blend and irritated my eye area more than the creamy one. I was concerned about my undereye area feeling heavy and cakey. Luckily, using a lightweight, high-coverage concealer mitigated this issue. With the darker lipstick, I needed two light layers of concealer, but only one with the lighter shade. A color-correcting concealer alone might be less irritating and equally effective. Be cautious with product selection, as some brands might be safer for use around the eyes. Although effective, I wouldn't recommend this tip for daily use.
Rating: 4 out of 5
Get winged eyeliner with a spoon
Tip: Use the handle of a spoon for a straight wing and the rounded part to create the curved tip, then fill in the wing.
My experience: Although I rarely attempt winged liner due to its difficulty, this method surprisingly yielded good results. It was awkward to position the spoon and apply the liner correctly. This slow process required precision to avoid errors. Filling in the wing proved challenging, likely due to my inexperience. Achieving symmetry was difficult but this technique could be helpful for those struggling with winged liner. I used a felt-tip liner, but a pencil or liquid liner might also be suitable.
Rating: 5 out of 5
Contour with a spoon
Tip: Place the rounded part of a spoon over the apples of your cheeks and apply bronzer or contour powder below the spoon. Blend thoroughly to avoid harsh lines.
My experience: I anticipated a quick and sharp contour using this method, and it was somewhat successful. The spoon effectively guides where to apply bronzer or contour powder, making it ideal for beginners or those who struggle with contouring. However, it required significant effort to blend the powder and soften the contour lines. Using less powder and more blending might yield better results.
Rating: 3 out of 5
Avoid getting polish on your fingers with glue
Tip: Apply Elmer’s glue around your nails using a small paintbrush, forming an oval shape close to the nails but not on them. Allow the glue to dry until it becomes transparent and non-tacky. Paint your nails as usual, let the polish dry, and then peel off the glue.
My experience: Initially, I thought this method would be tedious. Despite my experience, I often get polish on my skin. I usually clean up with nail polish remover and a Q-tip, so I hoped this method would be quicker and simpler. Applying glue was surprisingly relaxing, and peeling it off was enjoyable. Although I didn't get as close to my nails as I would have liked on some fingers, the overall result looked neat after peeling off the glue. This method was fun and straightforward, and I would definitely try it again. Next time, I will apply a thicker layer of glue for easier removal.
Rating: 5 out of 5
Sources:
brit.co
xovain.com
makeup.com
Have you tried any of these Pinterest tips, or would you in the future?


Leave a comment